Friday, November 22, 2024

How to Build a Lean-To Shed: Quick and Affordable Outdoor Storage

How to Build a Lean-To Shed: Quick and Affordable Outdoor Storage

How to Build a Lean-To Shed: Quick and Affordable Outdoor Storage

Hey there, fellow DIY enthusiasts! So you're thinking about building a lean-to shed? Smart move! They're incredibly versatile, relatively inexpensive, and a fantastic way to add some much-needed storage space to your property. Whether you need somewhere to stash garden tools, store firewood, or just keep your outdoor furniture safe from the elements, a lean-to shed is a perfect solution. And the best part? It's totally doable, even if you're not a seasoned builder. Let's dive into how to build your own!

Planning Your Lean-To Shed: The Foundation of Success

Before you even think about grabbing a hammer, proper planning is key. Rushing this stage will only lead to headaches later on. Trust me, I've been there!

Choosing the Right Location

First things first: where will your lean-to live? Consider these factors:

  • Proximity to your house or other buildings: This makes it easier to run electricity or plumbing (if needed) and provides some shelter from the wind.
  • Level ground: A flat surface is crucial for a stable structure. You might need to do some leveling with gravel or compacted dirt.
  • Sunlight and shade: Think about the amount of sun exposure you want. Too much direct sun can heat up the shed quickly, while too much shade might lead to dampness.
  • Access: Make sure you have easy access to the area for construction and future use. You'll need space to maneuver materials.

Determining the Size and Dimensions

How much stuff do you need to store? This dictates the size of your lean-to. Start by measuring the items you plan to keep inside. Add a little extra space for maneuvering. Remember, a smaller shed is easier and cheaper to build. Don't feel pressured to make it gigantic unless you truly need it.

Materials List: Gathering Your Arsenal

This list is a guideline; adjust it based on your specific lean-to design and local material prices.

  • Pressure-treated lumber: For the frame, this will resist rot and insects.
  • Plywood or OSB (Oriented Strand Board): For the walls and roof.
  • Roofing material: Asphalt shingles, metal roofing, or even heavy-duty plastic sheeting are all options. Consider your budget and climate.
  • Concrete blocks or a gravel base: For the foundation (optional, but highly recommended).
  • Nails, screws, and other fasteners: Get a variety of sizes.
  • Measuring tape, level, saw, hammer, drill, etc.: Gather your basic tools.
  • Safety glasses and work gloves: Safety first!

Building Your Lean-To Shed: A Step-by-Step Guide

Now for the fun part â€" actually building the thing! Remember, take your time and don't be afraid to ask for help if needed.

Laying the Foundation

A solid foundation prevents settling and rot. I highly recommend it! If you opt for a concrete block foundation, lay them out level, ensuring your lean-to is square. A gravel base is a simpler alternative; spread gravel evenly and compact it. The foundation should be slightly larger than the footprint of your lean-to.

Framing the Walls

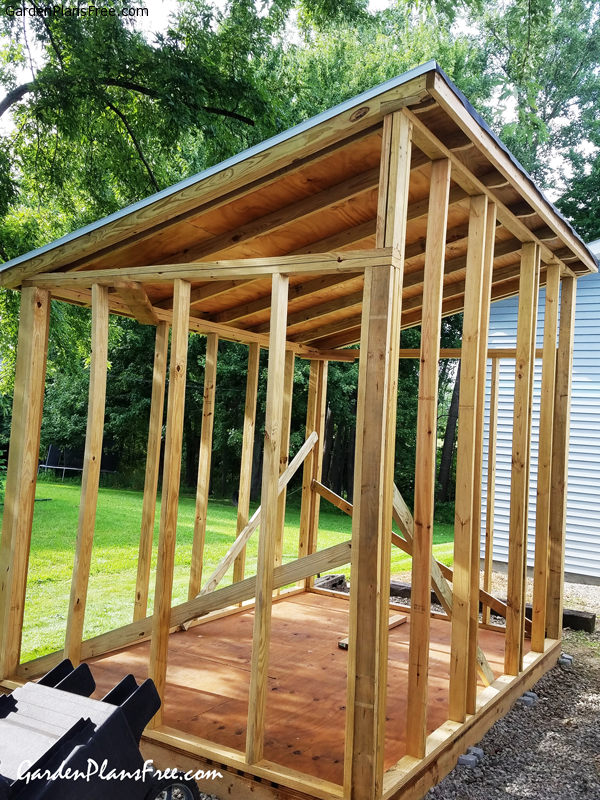
Build the frame using pressure-treated lumber. Construct the side walls first, making sure they’re plumb (perfectly vertical). If you're attaching the lean-to to an existing structure, ensure it's securely fastened.

Constructing the Roof

The roof is the most important part of protecting your belongings from the weather. The simplest design is a single-slope roof, which is what most lean-tos use. You'll need rafters that are long enough to provide sufficient overhang to prevent rain from splashing on the sides. Secure the rafters to the top of the walls and add sheathing (plywood or OSB).

Adding the Roofing Material

Now you get to cover your roof! Whether you choose asphalt shingles, metal roofing, or another material, follow the manufacturer's instructions carefully. Make sure all seams are properly sealed to prevent leaks. You'll thank yourself later!

Siding and Finishing Touches

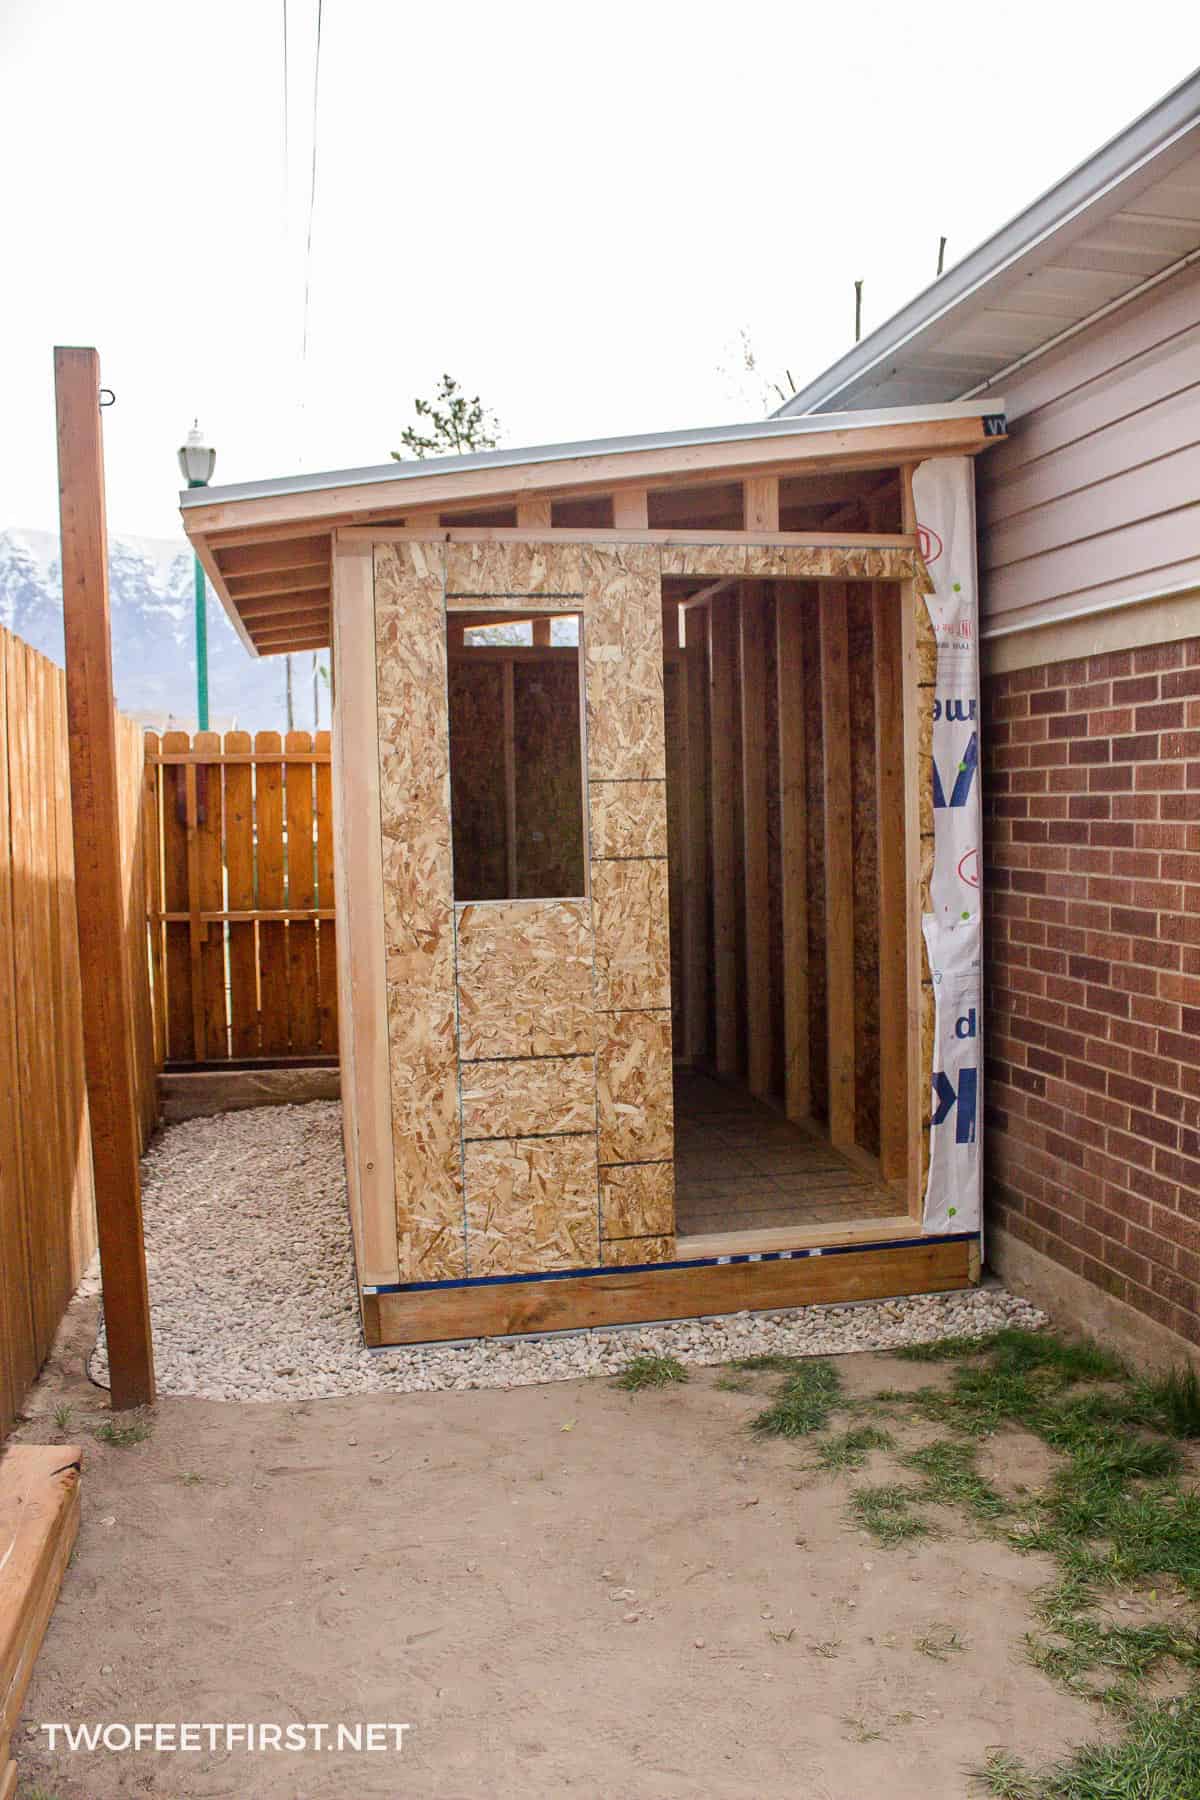
Once the roof is on, add your siding material (plywood, OSB, or even reclaimed wood for a rustic look). This adds a clean aesthetic and further protects your stored items. Consider adding a door, windows (for ventilation), and even paint or stain for extra protection and personalization.

Tips for Success

Here are a few extra pointers to make your lean-to project even smoother:

  • Check your local building codes: Before you start, confirm any regulations regarding sheds in your area. This can save you a lot of hassle down the line.
  • Work with a friend: Having an extra pair of hands makes the job much easier and faster.
  • Take breaks: Don't try to do everything in one day. It's better to take your time and ensure everything is done correctly.
  • Clean up regularly: Keep your workspace tidy to avoid accidents.
  • Have fun! Building a lean-to shed is a rewarding experience. Enjoy the process!

Frequently Asked Questions (FAQ)

Here are some questions people often ask about building lean-to sheds:

Q: How much does it cost to build a lean-to shed?

A: The cost varies widely depending on size, materials, and your location. You can build a basic lean-to for a few hundred dollars, but more elaborate designs can cost significantly more.

Q: How long does it take to build a lean-to shed?

A: Depending on your experience and the complexity of the design, it could take a weekend to a couple of weeks.

Q: Do I need a permit to build a lean-to shed?

A: Building codes vary by location. Check with your local authorities to determine whether a permit is required.

Q: Can I build a lean-to shed myself, even if I'm not a skilled builder?

A: Absolutely! Lean-to sheds are relatively simple structures. With a little patience and the right instructions, you can do it.

Q: What kind of foundation is best for a lean-to shed?

A: A concrete block foundation or a compacted gravel base are both excellent choices. They offer good stability and prevent rot.

Q: What type of wood should I use?

A: Pressure-treated lumber is highly recommended for its durability and resistance to rot and insects.

I hope this guide has given you the confidence to build your own lean-to shed! Remember, it's a great project to improve your property and skills, and it’s more achievable than you might think. Happy building!

Continue reading

Thursday, November 21, 2024

Wood Pallet Shed Build: Make a Practical Storage Shed with Old Pallets

Wood Pallet Shed Build: Make a Practical Storage Shed with Old Pallets

Wood Pallet Shed Build: Make a Practical Storage Shed with Old Pallets

Tired of clutter overflowing your garage or backyard? Transform discarded wood pallets into a charming and functional storage shed! This project offers a budget-friendly and eco-friendly way to add valuable storage space to your property. We'll guide you through each step, from sourcing pallets to the final touches, ensuring you build a sturdy and aesthetically pleasing shed perfect for your needs.

Sourcing and Preparing Your Pallets

Begin by acquiring a sufficient number of pallets. Source them responsibly. Check with local businesses like grocery stores, construction sites, or even post your request on online community forums. Inspect each pallet carefully; choose those that are structurally sound, free of rot, and relatively clean. Avoid pallets treated with chemical pesticides â€" look for the heat-treated stamp (HT) instead of the methyl bromide treatment (MB) stamp. Once you’ve gathered your pallets, you’ll need to dismantle them carefully. Use a pry bar or crowbar to separate the boards, working gently to avoid damaging the wood. Remove any nails or staples, and set aside any damaged or unusable wood.

Cleaning and Repairing the Pallets

Thoroughly clean the reclaimed wood. Use a wire brush to remove dirt, debris, and any lingering splinters. Consider pressure washing the boards for a more thorough cleaning. Inspect each board for damage; replace cracked or severely damaged pieces. You can use wood filler to repair minor cracks and imperfections, ensuring the structural integrity of your shed. Once repaired and cleaned, let the wood dry completely before proceeding to the next step. This prevents mold and ensures a durable final product.

Designing and Building the Shed Frame

Now, plan your shed's dimensions. Consider the available space and the amount of storage you need. Sketch a simple design, including the dimensions of the walls, roof, and door. This will act as your blueprint. For the frame, you'll need to create sturdy corner posts using multiple pallet boards secured together with strong screws and wood glue. Build the walls by assembling the frame, attaching the vertical boards to the corner posts. Ensure everything is square and level using a spirit level for a robust structure.

Adding Strength and Stability

To enhance stability, consider adding cross bracing between the vertical boards. This significantly strengthens the walls and prevents warping. You can also use longer boards spanning several sections for added support. Remember that proper framing is crucial for a long-lasting shed. Don't rush this step; take your time and ensure all joints are secure and properly fastened.

Roofing and Finishing Touches

Construct the roof using similar techniques to the walls. A simple gable roof is easy to build and provides excellent weather protection. You can use plywood or additional pallet wood for the roofing surface. For increased weather resistance, consider applying a waterproof sealant or roofing felt. Remember to add sufficient overhang to protect the walls from rain. Once the roof is complete, finish your shed with a coat of weather-resistant paint or sealant. This protects the wood from the elements and adds a professional finish.

Adding a Door and Finishing Details

Construct a simple door using more pallet wood. You can use hinges and a latch for a secure closure. For extra security, consider adding a padlock. Add any other details you desire, such as windows for ventilation or shelves for better organization inside the shed. Finally, consider landscaping around your new shed to complete the look and make it a seamless addition to your backyard.

With careful planning and execution, you can transform discarded pallets into a practical and attractive storage shed. Enjoy the satisfaction of creating something useful and unique while saving money and reducing waste!

Continue reading

Step-by-Step Wood Pallet Shed Guide for Budget-Conscious Builders

Step-by-Step Wood Pallet Shed Guide for Budget-Conscious Builders

Building Your Dream Pallet Shed: A Budget-Friendly Guide

Hey there, fellow DIY enthusiasts! So you're dreaming of a shed, but your bank account is singing a slightly different tune? Don't worry, you're not alone! Building a shed can be expensive, but it doesn't have to break the bank. With a little ingenuity and a whole lot of elbow grease, you can build a fantastic shed using reclaimed wood pallets â€" and we're going to show you exactly how.

This guide is your step-by-step roadmap to creating a sturdy and surprisingly stylish pallet shed without emptying your wallet. We'll cover everything from sourcing materials to the final touches, keeping things simple and straightforward along the way. Let's get started!

1. Sourcing Your Pallets: The Treasure Hunt Begins!

The beauty of a pallet shed lies in its sustainable nature. Instead of buying new lumber, we're going to rescue pallets from their impending doom â€" likely a landfill! Think of it as an eco-friendly treasure hunt.

Where to Find Pallets:

Your quest for the perfect pallets might lead you to some unexpected places. Here are some great starting points:

  • Local businesses: Grocery stores, breweries, and construction sites often have pallets they're willing to give away or sell cheaply. Just be sure to ask politely and beforehand.
  • Craigslist and Facebook Marketplace: These online marketplaces are treasure troves of free and inexpensive materials, including pallets. You might even find someone happy to deliver them!
  • Recycling centers: Some recycling centers have designated areas for reclaimed wood, including pallets. Check with your local center.

Important Note: When collecting pallets, be sure to inspect them carefully. You'll want to select pallets that are sturdy, free of rot, and relatively free of nails that are sticking out. Avoid pallets that have been treated with chemicals (like those marked with "HT" for heat treatment) unless you know how to safely handle them.

2. Planning Your Pallet Shed: Dream Big, But Start Small

Before you start hammering, grab a pencil and paper (or open your favorite design software)! Planning is crucial, even for a seemingly simple project like this. Consider these factors:

Size and Dimensions:

How much space do you actually need? A small shed for storing gardening tools will require fewer pallets than one for storing lawnmowers and bicycles. Start by drawing a simple plan, sketching the overall dimensions of your shed.

Foundation and Location:

You’ll need a level base for your shed. This could be as simple as a compacted gravel base or a more sophisticated concrete slab. Choose a location that's accessible, level, and provides adequate drainage. Think about sun exposure and wind direction as well.

Door and Window Placement:

Plan the placement of your door and any windows (if you’re feeling ambitious). Consider how you'll access the shed and where you might need natural light.

3. Construction Time: Let's Build!

With your plan in hand and your pallets gathered, it's time to get building! Remember safety first â€" wear gloves, safety glasses, and sturdy work boots.

Disassembling and Preparing Pallets:

Carefully disassemble your pallets using a crowbar and hammer, removing any loose or damaged wood. You might need to remove nails with a claw hammer and a nail puller. Clean the wood of any debris or loose splinters.

Building the Frame:

Use strong, sturdy pallet wood to build the frame of your shed. You can create a basic rectangular frame using long pallet boards. Secure connections with screws and wood glue for extra strength. Consider adding corner bracing for added stability.

Wall Construction:

Attach the remaining pallet sections to the frame to create the walls. You can use screws, nails, or a combination of both. Remember to leave space for your door and windows. Ensure the pallets are evenly spaced and securely fastened.

Roof Construction:

The roof is arguably the most crucial part. You can opt for a simple gable roof or a shed roof â€" whichever suits your design and skill level best. You might need to cut some pallet wood to create the necessary angles. Remember to use strong supports and secure everything tightly. Consider adding roofing felt or a tarp for weather protection.

Door and Window Installation:

Install your door (using hinges and a latch) and any windows. You can build these from leftover pallet wood or use readily available materials. Simple, functional is better than overly complex when you’re working with reclaimed wood.

Finishing Touches:

Once the structure is complete, you can add finishing touches. Consider staining or painting your shed for weather protection and a more polished look. You can also add shelving or other internal features as needed.

4. Finishing Up: Celebrate Your Achievement!

Congratulations! You've successfully built your own pallet shed! Take a moment to admire your handiwork. You've saved money, reduced waste, and created a functional space for your needs. Remember to keep the area around your shed clean and clear. Now go celebrate with a well-deserved cup of coffee!

Commonly Asked Questions

Q: How long does it take to build a pallet shed?

A: The time it takes varies significantly depending on the shed's size and complexity, as well as your experience level. A small, simple shed might take a weekend, while a larger, more elaborate project could take several weekends.

Q: What kind of tools do I need?

A: You'll need a hammer, crowbar, saw, screwdriver, drill, measuring tape, level, safety glasses, gloves, and possibly a nail puller.

Q: Can I use any type of pallet?

A: Not all pallets are created equal. Avoid pallets treated with chemicals unless you're certain about the treatment and safety precautions. Inspect pallets for rot and damage before using them.

Q: How can I make my pallet shed more weather-resistant?

A: Apply a wood sealant or paint to protect the wood from moisture. Add roofing felt or a tarp to the roof for additional protection.

Q: What if my pallets are different sizes?

A: Don't worry about perfectly uniform pallets. The rustic charm of a pallet shed is partly in its imperfections. Just be sure to plan carefully to account for variations in size and shape.

Happy building! Let me know if you have any other questions. And remember to share pictures of your finished shed â€" I'd love to see it!

Continue reading

How to Build a Lean-To Shed That Makes the Most of Small Spaces

How to Build a Lean-To Shed That Makes the Most of Small Spaces

Maximize Your Minimal Yard: Building a Space-Saving Lean-To Shed

Cramped for space but dreaming of extra storage? A lean-to shed, cleverly designed, can be the perfect solution. This article guides you through building a lean-to that maximizes every inch of your small yard, transforming unused wall space into a functional and attractive addition to your property. We'll cover choosing the right location, selecting materials, and executing the build, ensuring you create a shed that's both practical and aesthetically pleasing.

Planning Your Space-Saving Lean-To

Before you even pick up a hammer, careful planning is essential. Begin by identifying the ideal location. Consider proximity to existing structures â€" a house, garage, or fence â€" to provide support for your lean-to's roof. You’ll want a solid, level base for the shed. Assess sunlight exposure to determine the best placement for ventilation and natural light. Measure the available space precisely; accurate measurements prevent costly mistakes later. Sketch a detailed plan, including dimensions, material specifications, and any unique features. This blueprint guides your entire construction process, ensuring a smooth and efficient build.

Choosing the Right Size and Materials

The size of your lean-to hinges on your storage needs and available space. A smaller shed, perhaps 4ft x 8ft, might suffice for storing gardening tools and supplies. However, if you need more space for bicycles, outdoor furniture, or larger items, adjust your dimensions accordingly. Select durable, weather-resistant materials. Pressure-treated lumber provides excellent longevity and rot resistance. For roofing, consider metal or asphalt shingles, depending on your budget and aesthetic preferences. Metal roofing is especially durable and requires less maintenance. Explore options like polycarbonate panels for natural light penetration.

Building Your Compact Lean-To Shed

With your plan finalized and materials gathered, it's time to build. Begin by preparing the foundation. A level concrete slab is ideal, offering stability and longevity. Alternatively, you can create a compacted gravel base, ensuring proper drainage. Construct the frame using pressure-treated lumber. Follow your blueprint meticulously, ensuring all cuts are precise and joints are properly secured with screws or bolts. Always prioritize safety; wear safety glasses and work gloves.

Erecting the Walls and Roof

Once the frame is complete, erect the walls. Use plywood or similar sheathing, ensuring a tight fit to prevent drafts and moisture intrusion. Install any windows or doors at this stage. For the roof, build the rafters according to your plan, ensuring they are securely attached to the frame. Cover the rafters with your chosen roofing material, paying close attention to overlapping and sealing to ensure watertightness. Apply flashing around edges for additional protection against leaks.

Adding Finishing Touches

Once the structure is complete, add finishing touches to enhance both functionality and aesthetics. Consider adding shelves for organized storage. Painting or staining the exterior protects the wood and enhances the shed's visual appeal. Install a sturdy door with a lock for security. Proper ventilation is crucial; consider adding vents to prevent moisture buildup. A small window can also provide natural light and improved ventilation.

Maximizing Space Inside Your Lean-To

Even a small lean-to offers ample storage with clever organization. Utilize vertical space with shelves and wall-mounted storage solutions. Employ stackable containers and bins to maximize space utilization. Consider using hooks for hanging tools and other lightweight items. Opt for slimline shelving units to minimize space consumption. A well-organized lean-to effectively prevents clutter and maximizes storage capacity, even within a compact footprint.

By following these steps, you can successfully build a lean-to shed that elegantly solves your storage woes, turning a small space into a valuable asset. Remember, careful planning and attention to detail are key to a successful project. Happy building!

Continue reading

Create a Simple Small Pallet Shed with These DIY Steps

Create a Simple Small Pallet Shed with These DIY Steps

Building Your Own Pallet Shed: A Beginner's Guide

Hey there, fellow DIY enthusiasts! So you're looking to build a small shed, but don't want to break the bank or spend a fortune on lumber? You're in luck! This guide will walk you through building a simple, charming, and surprisingly sturdy shed using repurposed pallets. It’s a great project for beginners, and the best part? It's super budget-friendly!

Now, let's be realistic. This isn't going to be a palace. We're talking a small shed, perfect for storing garden tools, bikes, or maybe even a small lawnmower. But it'll be yours, built by your own two hands, and that's pretty darn satisfying!

Step 1: Gathering Your Materials â€" The Pallet Hunt!

The heart of this project lies in finding the right pallets. This is arguably the most fun (and sometimes the most challenging) part. Here’s what you need to keep in mind:

Finding Your Pallets

Your best bet is searching for free pallets. Check behind businesses â€" construction sites, supermarkets, and even breweries sometimes have pallets they're happy to get rid of. Just be sure to ask permission before taking any! Also, be aware of the type of wood and the condition of the pallets. You want pallets that are sturdy and relatively free of rot or significant damage. Avoid pallets that have been treated with chemicals (look for the heat treatment stamp â€" HT â€" which means it’s safe for reuse).

Other Materials You'll Need

Beyond pallets, you'll need a few other things:

  • Screws: Lots and lots of screws. Get a variety of lengths, including longer ones for the framing and shorter ones for securing the pallet walls.
  • Hammer or Mallet: To gently tap things into place.
  • Drill (with screwdriver bits): Makes life SO much easier.
  • Measuring Tape and Level: Essential for square construction.
  • Safety Glasses and Work Gloves: Always protect yourself!
  • Optional: Pressure-treated wood for the base (if you want a more permanent solution than just setting the shed on the ground), roofing felt or other roofing material, paint or stain (to personalize your shed!), hinges for a door.

Step 2: Prepping the Pallets

Once you've got your pallets, it's time to give them a little TLC. This step is crucial for ensuring a strong and long-lasting shed.

Cleaning and Repair

First, give your pallets a good clean. Use a brush, and maybe a pressure washer if you have one, to remove dirt, debris, and any loose nails or staples. Repair any broken or damaged parts using scrap wood and screws. You want them as structurally sound as possible.

Disassembling (Maybe):

Depending on the size and condition of your pallets, you might want to partially disassemble them. This will give you more flexibility in constructing the walls and roof of your shed. If the pallets are sturdy enough, however, you can keep them intact and use them as sections of the walls.

Step 3: Building the Frame

Now for the fun part â€" actually building the shed! We're going to start with a simple rectangular frame.

Creating the Base

If you're using pressure-treated lumber for the base, construct a rectangular frame using the lumber, making it slightly larger than the intended size of your shed to accommodate the pallet walls. Secure the corners with screws. If you’re skipping the pressure-treated base, you can directly place the pallet walls on a level area.

Erecting the Walls

Position your prepared pallets to create the walls of your shed. Use longer screws to securely attach the pallets to the base frame (if you have one) or to each other. Ensure the walls are plumb (perfectly vertical) using a level. You might need to use additional bracing or supports to maintain the structure’s integrity, especially if you're using disassembled pallets.

Constructing the Roof

For the roof, you can get creative. A simple gable roof (a triangular roof with two sloping sides) is relatively easy to construct using more pallets or additional lumber. Make sure the roof has sufficient slope to allow water to run off. You can add roofing felt or other roofing materials for waterproofing.

Step 4: Adding the Finishing Touches

You're almost there! Now it's time to add those finishing touches that will make your pallet shed truly shine.

A Door (Optional)

If you want a door, you can either create one using more pallets or scrap lumber, or you can purchase a pre-made door that fits your shed. Install hinges and a latch or handle.

Painting or Staining (Optional)

Give your shed a fresh coat of paint or stain to protect the wood from the elements and add a personal touch. Choose colors that complement your surroundings.

Other Enhancements

Consider adding a small window for ventilation, or a shelf inside for extra storage. Let your creativity flow!

Step 5: Enjoy Your New Shed!

Congratulations! You’ve successfully built your own pallet shed! Take a moment to admire your handiwork. Remember, this is a basic design, feel free to customize it to suit your needs and preferences. The beauty of DIY is in the flexibility.

Commonly Asked Questions

Q: How long does this project take?

A: This depends on your experience and the complexity of your design. A simple shed can be built in a weekend, while a more elaborate design might take a few days.

Q: How much does this cost?

A: The main cost is the additional materials like screws, possibly lumber for the base, and roofing materials. If you find free pallets, the overall cost can be minimal.

Q: How durable is a pallet shed?

A: The durability depends on the quality of the pallets you use and how well you construct the shed. With proper care and maintenance, a pallet shed can last for several years. Remember, it’s not designed for extreme weather conditions.

Q: Can I use treated pallets?

A: Avoid using pallets treated with chemicals unless they are specifically marked as "heat treated" (HT). These are safe for reuse. Other treated pallets may contain harmful chemicals.

Q: What if my pallets are different sizes?

A: That's fine! You might need to get a little more creative with your design, but it's entirely manageable. You might need to add extra supports to compensate for variations in pallet size.

I hope this guide has inspired you to start your own pallet shed project! Happy building!

Continue reading

How to Build a Lean-To Shed: A Simple Guide for Your Backyard

How to Build a Lean-To Shed: A Simple Guide for Your Backyard

How to Build a Lean-To Shed: A Simple Guide for Your Backyard

Hey there, fellow DIY enthusiasts! So you're thinking about building a lean-to shed? Awesome! They're incredibly versatile, relatively easy to build, and a fantastic way to add extra storage space to your backyard without breaking the bank or needing advanced carpentry skills. This guide will walk you through the process, step-by-step, in a way that even a complete beginner can understand. Let's get started!

Planning Your Lean-To Shed

Before you even think about grabbing a hammer, some careful planning is key. This phase might seem tedious, but trust me, it’ll save you headaches (and potentially money) down the line.

Choosing a Location

Where will your lean-to reside? Consider these factors:
  • Existing Structures: Lean-tos are perfect for attaching to existing buildings like your house, garage, or fence. This provides support and simplifies the foundation process.
  • Sunlight and Shade: Do you need a sunny spot for drying things, or a shaded area for storing sensitive items? Think about how the sun will affect the shed throughout the day.
  • Access and Drainage: Make sure you have easy access to the shed for loading and unloading. Also, ensure the location has good drainage to prevent water buildup.
  • Local Regulations: Check with your local council or homeowner's association to see if there are any building permits or restrictions you need to be aware of.

Determining Size and Dimensions

How much storage space do you actually need? Don't overestimate! A smaller lean-to is easier and cheaper to build. Consider:
  • What you'll store: Bikes, gardening tools, lawnmower? This will directly influence your shed's dimensions.
  • Available space: Don't make the shed so large it overwhelms your backyard or blocks access to other areas.
  • Building materials: Standard lumber sizes (like 2x4s and 4x8 sheets of plywood) will help dictate your final dimensions â€" working with these standard sizes makes things easier.

Gathering Materials

This is where your shopping list comes in handy! You'll need:
  • Pressure-treated lumber: For the frame, floor, and roof. Pressure-treated wood is crucial for longevity, especially for ground contact.
  • Plywood or OSB (Oriented Strand Board): For the shed's siding and roof sheathing.
  • Roofing material: Asphalt shingles, metal roofing, or even corrugated plastic are all viable options. Consider cost and your aesthetic preferences.
  • Fasteners: Nails, screws, and possibly construction adhesive. Galvanized nails are a good choice for outdoor use.
  • Concrete blocks or piers (optional): For a more stable foundation. This isn't always necessary, especially for smaller lean-tos.
  • Tools: Measuring tape, saw (circular saw is recommended), hammer, drill, level, shovel (if doing a foundation), safety glasses, and work gloves are essential.

Building Your Lean-To Shed: A Step-by-Step Guide

Let's build! Remember safety first â€" always wear safety glasses and work gloves.

Foundation (Optional)

If you're building a larger shed or on uneven ground, a simple foundation is recommended. This could be as simple as laying down concrete blocks or constructing small concrete piers. Leveling is crucial here!

Framing the Base and Walls

Using your pressure-treated lumber, build a rectangular frame for the base of your shed. This frame will sit directly on the ground (or your foundation). Erect the wall framing, attaching it securely to the base frame and your existing structure. Use a level constantly to ensure everything is perfectly plumb and square!

Sheathing the Walls

Now, it’s time to cover your frame. Attach plywood or OSB sheets to the wall frame, creating a solid exterior. Ensure the sheets are properly aligned and secured.

Building the Roof

This is where your carpentry skills get a little more involved, but it's still manageable. Build a simple sloped roof frame using more pressure-treated lumber. Attach this roof frame to the top of your walls. Remember to consider the slope required for proper water drainage.

Sheathing and Roofing the Roof

Once the roof frame is up, sheathe it with plywood or OSB. Then, add your chosen roofing material â€" asphalt shingles, metal roofing, or even corrugated plastic are all viable choices.

Adding Doors and Windows (Optional)

If you want to be able to access the shed easily and/or need some ventilation, consider adding a door and/or windows. This adds a bit more complexity, but is entirely achievable with the right tools and patience.

Finishing Touches

Once the main structure is complete, you can add finishing touches, like painting, caulking, and adding trim to enhance both the appearance and durability of your lean-to shed.

Commonly Asked Questions

Q: Do I need a building permit to build a lean-to shed?

A: It depends on your local regulations. Some areas require permits for even small structures, while others don't. Check with your local council or homeowner's association to be sure.

Q: How long does it take to build a lean-to shed?

A: This varies greatly depending on the size and complexity of your shed, as well as your experience level. A small, simple lean-to could be built in a weekend, while a larger, more complex one might take several days or even longer.

Q: What type of wood is best for a lean-to shed?

A: Pressure-treated lumber is highly recommended for all parts of the structure, especially those in contact with the ground. This will significantly extend the lifespan of your shed.

Q: Can I build a lean-to shed against any wall?

A: Ideally, you should attach it to a sturdy wall that can handle the additional weight. You’ll need to ensure the wall has enough structural integrity to support the added lean-to.

Q: What's the best way to secure the lean-to to the existing structure?

A: Use strong metal brackets and long screws to securely attach the lean-to's framing to the existing structure. Ensure proper penetration into the structural members of the existing building.

Q: How much does it cost to build a lean-to shed?

A: The cost varies significantly based on size, materials, and your labor costs. A small, simple shed could be built for a few hundred dollars, while larger, more complex sheds can cost significantly more.

Remember, building a lean-to shed is a rewarding experience! Don't be afraid to ask for help if you get stuck, and most importantly, have fun!
Continue reading

DIY Lean-To Shed: Simple Plans for a Beautiful Outdoor Build

DIY Lean-To Shed: Simple Plans for a Beautiful Outdoor Build

DIY Lean-To Shed: Simple Plans for a Beautiful Outdoor Build

Constructing a lean-to shed offers a rewarding blend of practicality and aesthetic appeal. This guide provides comprehensive plans for building a beautiful and functional lean-to shed, suitable for novice DIY enthusiasts. We will cover everything from initial planning and material selection to construction techniques and finishing touches, ensuring a successful and enjoyable project.

Phase 1: Planning and Design

Before commencing construction, meticulous planning is paramount. This phase involves determining the shed's dimensions, location, and desired features. Careful consideration of these factors will significantly impact the project's success and longevity.

Determining Dimensions and Location

The dimensions of your lean-to shed will be primarily dictated by its intended purpose and available space. Consider the items you plan to store; a larger shed will accommodate more, but it will also require more materials and labor. Careful measurement of the available area against your desired shed size is crucial to ensure a proper fit against the existing structure (e.g., house, garage, fence). Ensure sufficient clearance is left for access and maneuverability around the completed shed.

Choosing Materials

Material selection impacts both the aesthetics and durability of your shed. Pressure-treated lumber is highly recommended for its resistance to rot and insect infestation. Consider using cedar or redwood for a more aesthetically pleasing, naturally rot-resistant option, though it comes at a higher cost. For roofing, asphalt shingles provide a cost-effective and readily available solution. Metal roofing offers superior longevity and weather resistance but requires more specialized installation techniques. Consider the local climate and your budget when selecting materials.

Essential Tools and Equipment

Prior to commencing construction, gather all necessary tools and equipment. This will ensure a smooth and efficient workflow. Essential tools include:

  • Measuring tape
  • Level
  • Shovel
  • Post-hole digger (or auger)
  • Circular saw
  • Drill with assorted drill bits
  • Hammer
  • Safety glasses
  • Work gloves
  • Screwdriver (both Phillips and flathead)
  • Safety harness and fall protection (if working at heights)

The specific tools required may vary slightly depending on the chosen materials and design. Ensure you have all necessary tools before commencing construction to avoid delays.

Phase 2: Foundation and Framing

The foundation and framing form the structural backbone of your lean-to shed. A robust and well-constructed foundation and frame will ensure the longevity and stability of your structure.

Preparing the Foundation

The foundation for your lean-to shed should be level and adequately sized to support the structure. For a smaller lean-to, a simple gravel base may suffice. For larger structures, a concrete slab or concrete piers may be necessary. Ensure the ground is properly leveled and compacted before pouring concrete. If using piers, ensure they are set deep enough to provide adequate support and are properly spaced.

Framing the Walls and Roof

The framing process involves constructing the walls and roof structure. Begin by cutting the lumber to the appropriate dimensions based on your pre-determined plans. Use pressure-treated lumber for all framing members to ensure durability. Construct the wall frames, ensuring they are square and plumb. For the roof, construct rafters according to your desired roof pitch. Securely fasten all framing members using appropriate nails or screws.

Consider using a level and a square to ensure accuracy throughout the framing process. Precise cuts and proper alignment are essential for a stable and aesthetically pleasing structure. The lean-to structure should be well-anchored to the supporting wall or structure. Consider using appropriate connectors and fasteners to create a strong and durable bond.

Phase 3: Roofing and Siding

Once the framing is complete, the roofing and siding can be installed. These elements provide weather protection and enhance the shed's aesthetic appeal.

Installing the Roofing

Begin by installing underlayment on the roof rafters to provide a water-resistant barrier. This will protect the structure from moisture damage. Then, install the chosen roofing material according to the manufacturer’s instructions. Ensure proper overlap between shingles or metal sheets to prevent leaks. For asphalt shingles, follow the manufacturer's recommendations for nail spacing and shingle placement.

Installing the Siding

After completing the roofing, install the siding. This can be accomplished using a variety of materials, including wood, vinyl, or metal siding. Ensure proper overlapping of siding materials to prevent water penetration. Properly securing the siding to the framing is crucial to ensure structural integrity and weather protection. Remember to leave space for ventilation to prevent moisture buildup.

Phase 4: Finishing Touches and Safety Considerations

Once the main construction is complete, adding finishing touches will enhance both the functionality and aesthetic appeal of your lean-to shed. Prioritizing safety throughout the entire process is paramount.

Adding Finishing Touches

Consider adding a door and windows to your lean-to shed for easy access and natural light. Paint or stain the exterior to enhance its appearance and protect the wood from the elements. Adding shelves or other interior features will increase storage capacity. Consider incorporating weather stripping around doors and windows to enhance weather resistance.

Safety Precautions

Safety is paramount throughout the entire construction process. Always wear appropriate safety equipment, including safety glasses, work gloves, and a dust mask. When working at heights, use a safety harness and fall protection system. Ensure proper ventilation when working with paints, stains, or other chemicals. Follow all manufacturer’s instructions for the use of tools and materials. Never work alone on a construction project; always have a helper available.

Building a lean-to shed is a rewarding project that can enhance the functionality and aesthetic appeal of your property. By following these detailed plans and prioritizing safety, you can successfully create a beautiful and durable outdoor structure.

Continue reading
 

How to Build a Shed Copyright © 2016 | Powered by Blogger